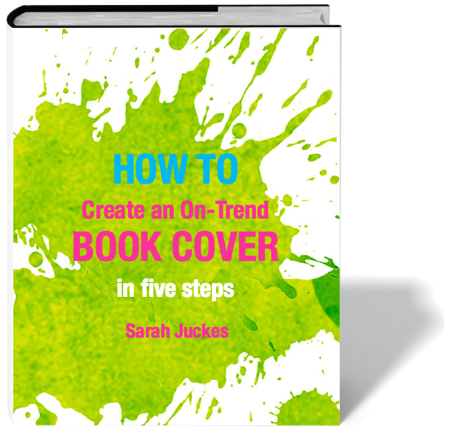
How to create an on-trend book cover in 5 steps
An effective book cover can make the difference between obscurity and bestseller. Sarah Juckes shows you how to create your own.
This article first appeared in issue 7 of Publishing Talk Magazine.
[rt_reading_time label="Reading Time:" postfix="minutes" postfix_singular="minute"]
 While helping hundreds of authors self-publish books with CompletelyNovel.com, I saw first-hand the difference an effective book cover can make.
Using cover components that are currently on-trend in a genre can catapult a new book by an unknown author into the shopping carts of readers. Here are five tried-and-tested steps to create a professional and current book cover.
1. Identify similar books your readers loved
Before you work on making your book ‘stand out’, you first need to ensure that your readers are going to recognise your book as the genre/type of book they usually enjoy. First of all, identify the primary target readers for your book (Young adults? Crime thriller enthusiasts? Business owners?) and collate a mood board of book covers they might have enjoyed. If you’re not sure – think about the books that inspired you to write.
For example, an author with a travel/sports book might identify her primary target readers as keen runners. By using social reading websites such as Goodreads and even Amazon’s ‘recommended’ function, she can find books that her target readers might have already read and loved. Pinterest is a perfect tool for collating these covers together for Step Two.
2. Pinpoint the key visual signifiers in similar book covers
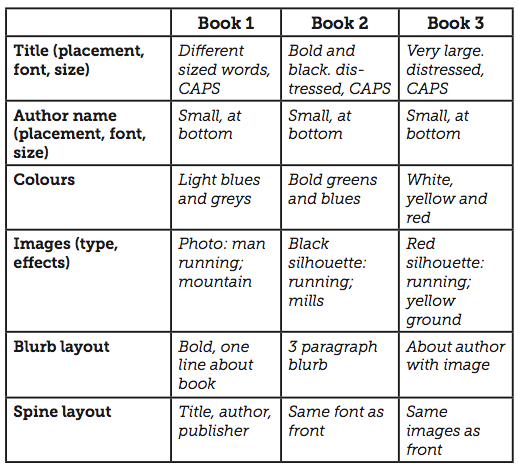
Once you have a clear idea of what books your reader loves, you can discover the key ‘visual signifiers’ that they will recognise in their favourite covers. For instance, our sports/travel author may find that many books in her genre include a figure of a person running on the cover, with bright colours and a large title. Whereas a crime fiction author might find that a colour-picked photograph and bold, distressed font is currently popular.
 Choose three book covers from your moodboard that have been published in the last year and fill out the table like the one below. Go into as much detail as you can – the more visual signifiers you find, the better!
 Once you know the cover conventions for your genre, you can use these to create a cover that your readers will recognise, as well as something that will stand out on a shelf.
Resist the temptation to defy all the conventions of your genre at this stage – this is something you can do after you have a strong reader following behind you. For now, your aim is to communicate to a reader where your book fits in with their expectations.
3. Draft your cover
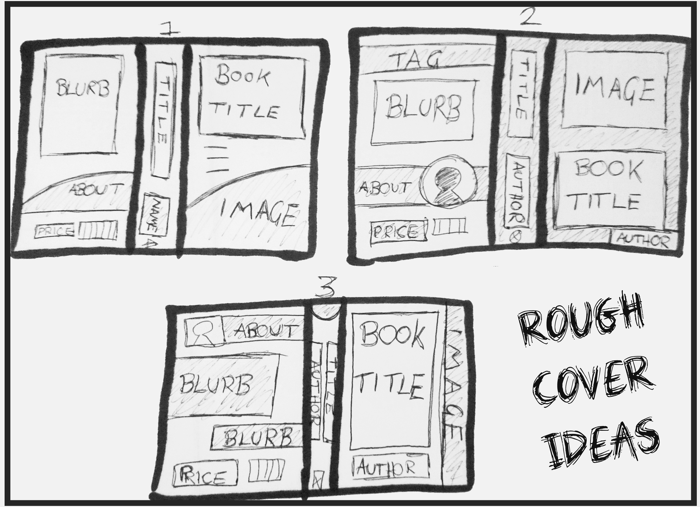
It can be really easy to get bogged down in the specifics of creating a cover, so to start with, play about with a few very basic drafts. Take the visual signifiers you identified in the last task and arrange them in a rough outline using a pen and paper. Try a few different arrangements – which one looks best?
Next, start filling it in with a bit more detail – perhaps using Google Drawings, or Paint (again, don’t get too fixated on perfecting things yet). Choose three different images using photo-finding websites such as iStockPhoto and ShutterStock. Add different colours and shades, as well as different fonts and wording for any taglines and the blurb. This time, get feedback from your target readers via social media and reading groups. Which draft do they like best? Keep playing until you have a sketch of what you’d like your finished cover to look like.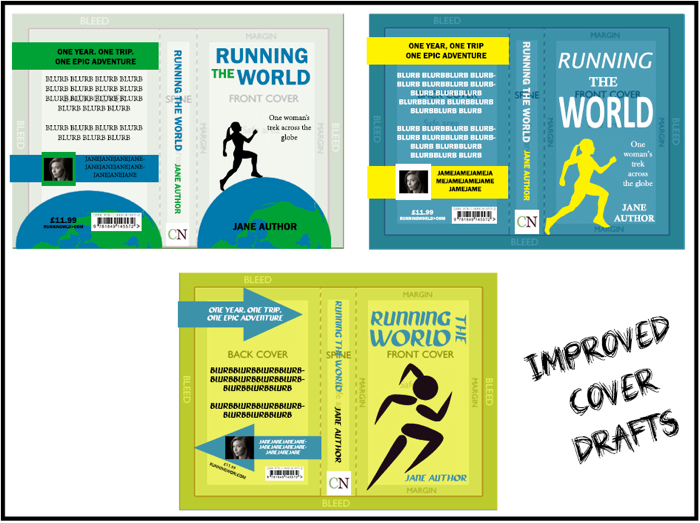
4. Create your cover
My cover creation software of choice is Photoshop, as it has all the tools I need to create a beautiful and precise cover. It is a little expensive though, so this might be where you want to bring in the services of a professional designer, or try using a free version of Photoshop, such as Gimp.
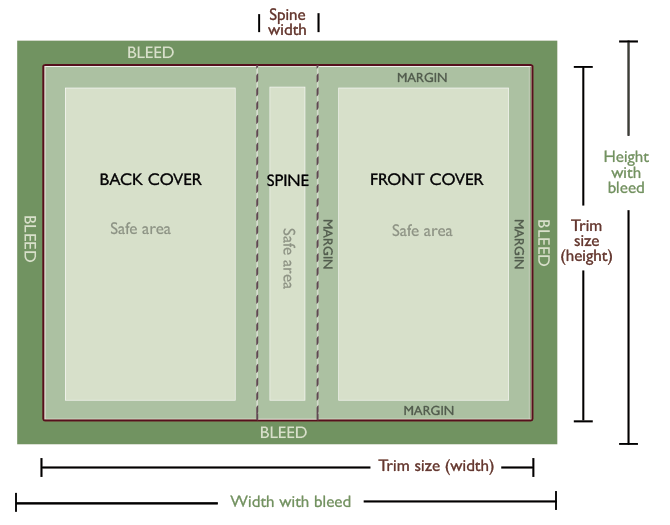
Firstly, create a canvas using the print specifications from your printer. This should include (from left to right) a back cover, a spine and a front cover design on one page (if you are designing a cover for a print book) and a front cover only for an eBook. I’m going to focus on creating a cover template for a print book.
Top 5 Photoshop tools for creating a cover template
- Guides – To help you map out your spine and margins.
- Rulers – Change these to millimetres to make measuring much easier.
- Content aware fill – Wonderful for images that aren’t quite the right shape.
- Smart layers – For adding different layer effects.
- Google – There’s tonnes of help and tutorials out there if you get stuck.
Getting the images and colours right
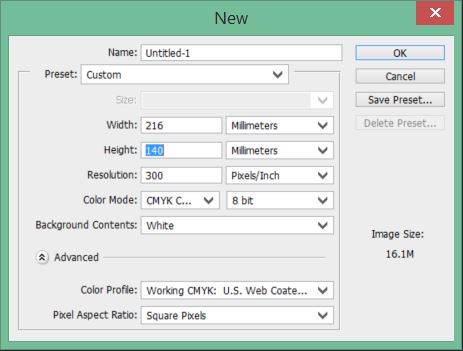 Graphics software will let you choose what’s called a colour profile. For print books you should always select CMYK as this is the standard that printers use and will help ensure your colours come out properly.
If you are creating an image that will be only used on a screen, then you can choose the RGB colour profile.
Ensure all the images you are using are large – images for printing need to be at least 300 dpi. Again, all these options are available when you first create your file. You will need to include the following components in your template:
- Spine Width. This will depend on the number of pages in your manuscript and the thickness of paper used. It’s worth getting the exact measurement from your publisher/printer, but a rough calculation you can do for paperbacks is (number of pages) x 0.054 = width in mm.
- Bleed. To ensure your cover doesn’t have any white space along the edges, include a 3mm bleed around the outside. Don’t place anything important in here as it will get cut off by the printer!
- Margin. Include a margin between the trim line and any texts and images. This will ensure nothing important gets cut and makes your book look more professional.
- Trim size. This is the size your cover will be when cut by the printers.
5. Add visual signifiers to your book cover
Once you have your template in place, you can start adding your cover signifiers to the ‘safe area’ inside your template. Don’t forget to make sure all your images and text line up (you can use Photoshop guides to help you); that you have spell-checked your blurb; and added a barcode and price to the back. Also, ensure your spine is the right way around! It should face upwards when the book is back-side down.
Don’t underestimate the time it takes to craft a brilliant blurb. This is one of the most important components of a book cover. I wrote some advice on this for the Alliance of Independent Authors here.
Next steps
Keep a clearly-labelled PSD file with your layers on somewhere safe, in case you need to come back to it later. You should also test your cover with your readers – what do they think?
Remember – what is ‘on-trend’ is always changing, so spend time in bookshops and keep reading similar books to yours to stay on top of what is current in your genre. In a few years time, you might need to follow these steps again.
It sounds a little complicated, I like the concept offered by 99designs.com have any of your authors experienced using them?
Does CN have a list of tried and tested book cover creators?
Hi Peter – do you mean creator platforms or creator people? CompletelyNovel has some people they trust here: https://completelynovel.com/self-publishing/people-we-trust